I believe you come here casue you have seen my video about add USB-C Audio & charging Port for your Gameboy advance SP:
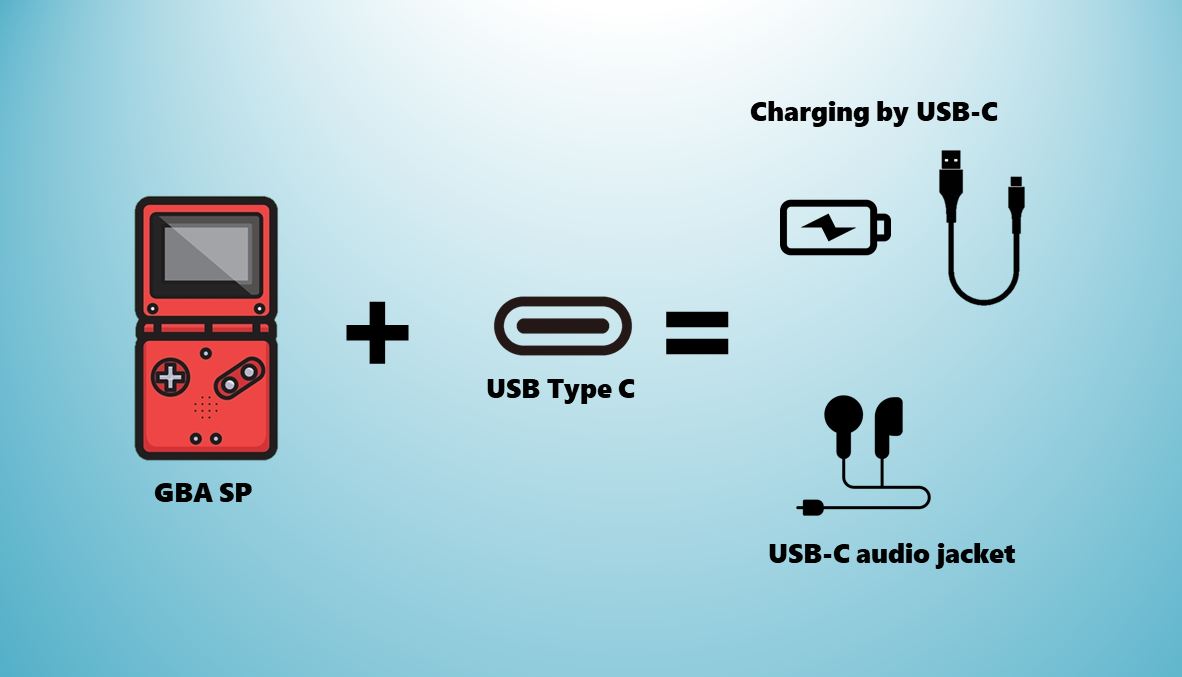
Yes, it’s currently best way to update your SP, if you still like to play it on-go without taking some more specific SP charger or audio-out toggle. And i’m glad to share with you some tips about how to mod:
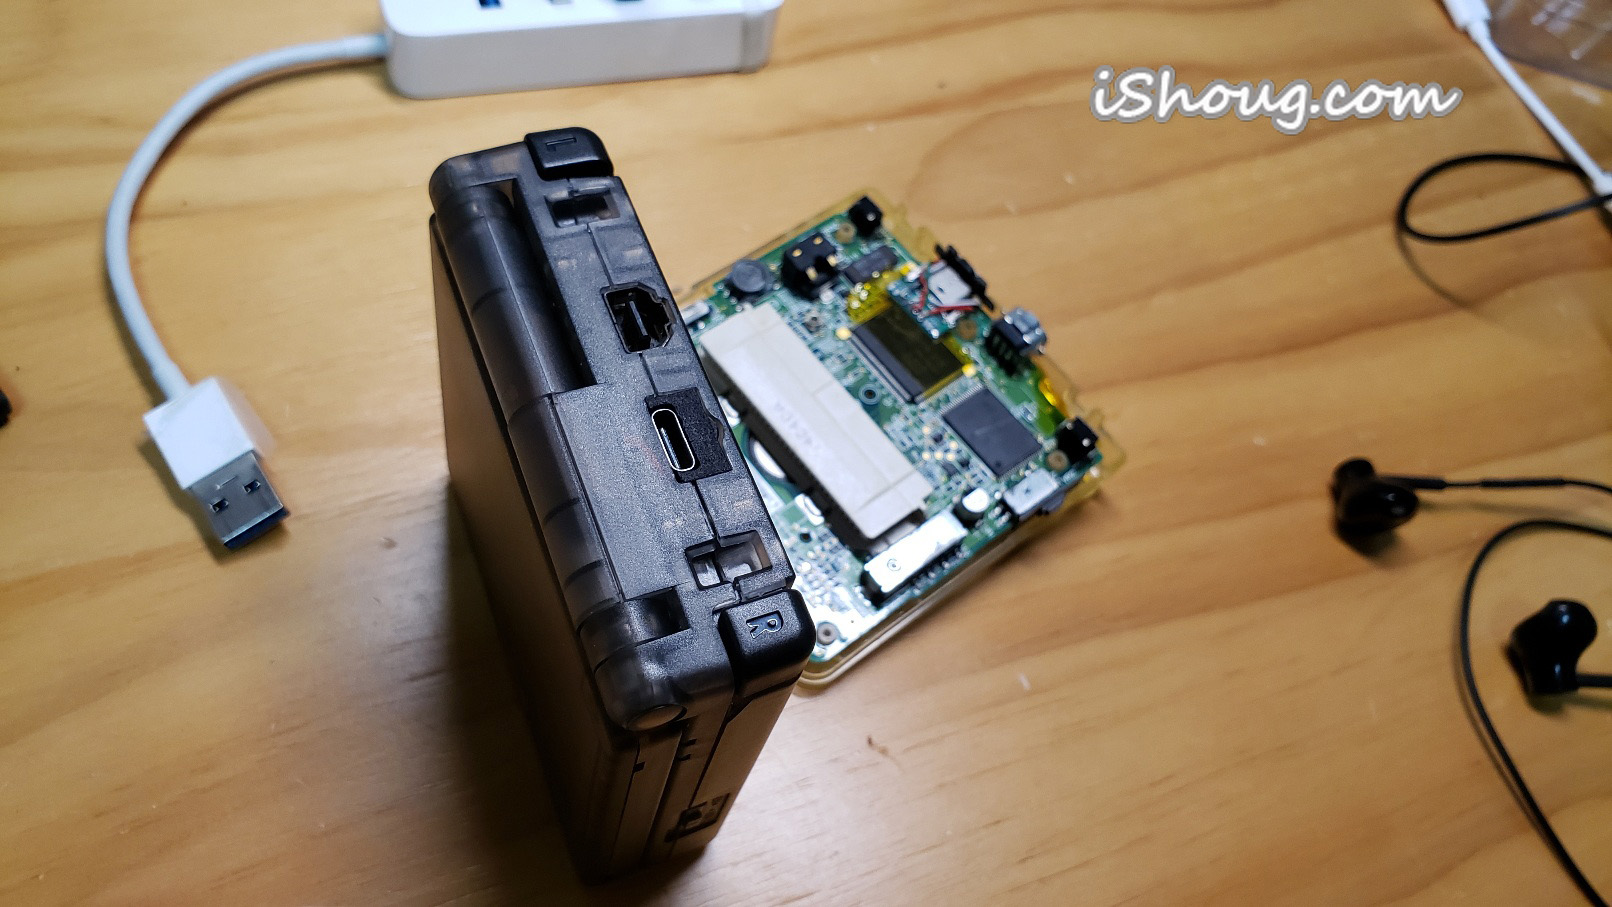
- Buy a proper 24pin Usb-C port, not any port can realize the audio function. I have used this one below, you may purchase it from amazon or aliexpress.
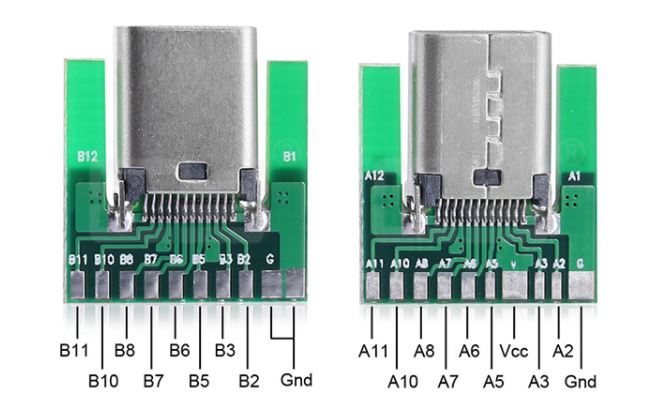
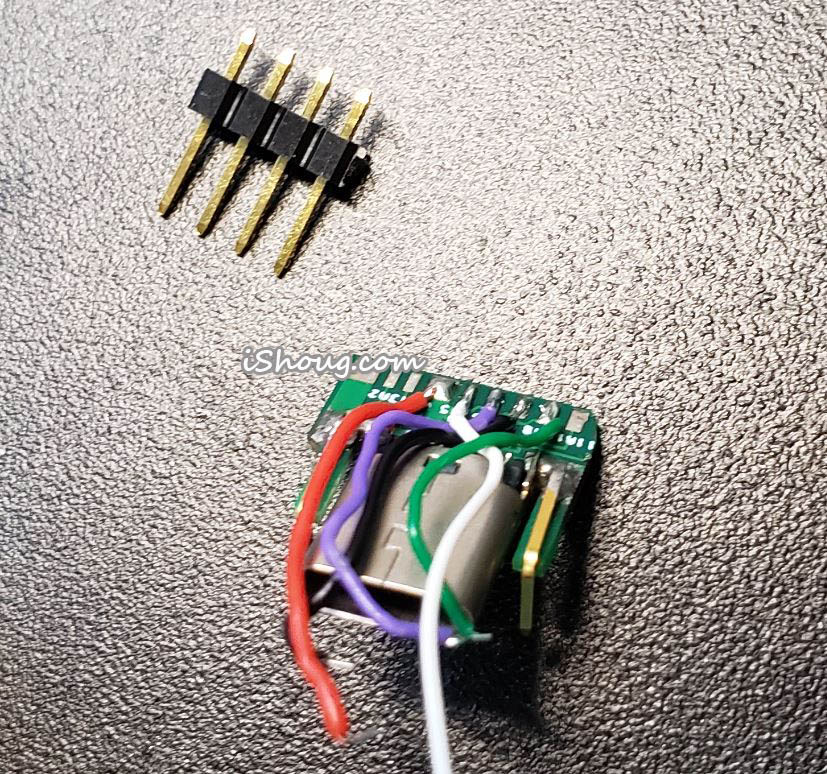
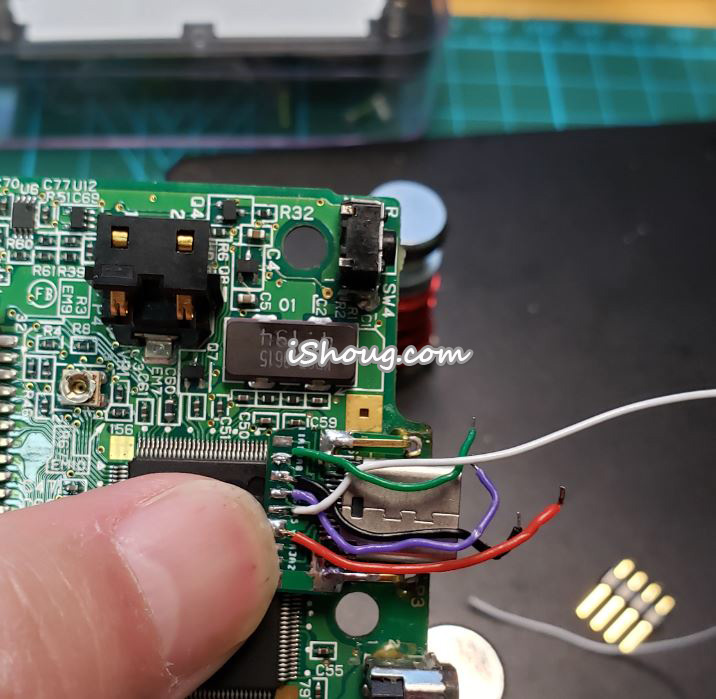
- when you remove the original SP charging port, take care not to solder off the pads. but it’s really hard if you have a soldering iron^^^ but don’t worry, you can still wire from other pads on mother board instead just like what i have done. I have share my solder schematic at end of the post.
- fastening the port with SP mother board. There will be lots of plug in/out with the new port, so it must be installed steady there, and here is my method: solder 2 90 degree folded sticks to the port, and then stick into the original board’s through holes for original port.
- cover the hole at shell top. the new usb-C port is much smaller than original ugly big port, so a big hole is left at shell top. if not covering it, all internal PCB is exposed^^ and I have designed a 3D print part to cover it, and it fits in perfectly. more important the part also help to fasten the port. You can download the 3D model file from links at end
———————————————————————————————————
And finally share with you the detail soldering schematics and the 3D print part.
if your really appreciate my sharing and want to support me, you may click the picture and buy me a coffee:)

https://www.buymeacoffee.com/ishoug
and get the files by click links below:
Byebye all retro boys and girls.
many thanks to 666Gothicgirl , who has first workout the MOD.

Hello for your article,
I’m making my own PCB for make the installation professional. I was checking your information and I think it’s wrong but it’s working for you, so I don’t understand why.
All information I found on internet says the EXT2 connector pinout is: (pin 1 is on the right, pin 6 is on the left)
1 Headphone Detect
2 Audio L
3 VCC
4 Audio R
5 Audio GND
6 GND
But your pinout is:
1 Audio L (you call it: 6)
2 VCC (you call it: 5)
3 Audio R (you call it: 4)
4 Audio GND (you call it: 3)
5 Speaker (you call it: 2)
6 GND (you call it: 1)
How you can see, only the GND pin match! I checked it with my multimeter and my result of pinout match with the information I found on internet, but not with your installation.
Why is it working on your GBASP?
Kind regards
I'm sorry, you're completely right! Fuking photos on internet, all are wrong
hah, we always need to check by ourselves. nice to know you solve it
Hello
I'm having trouble installing this mod, i followed the directions but i get no sound out of the adapter plugged in, both the speaker mute and charging functions work.
If you have any advise i would love to hear it.
Thank You
check your soldering on the mod board, there is one pin about sound on/off